Travel day product effects give a simple item a reason to be in the frame. A tumbler, lip oil, headphones, or charger stops looking like a catalog cutout when it feels packed for somewhere. The useful part is that the scene can stay simple: one hero product, one travel cue, one clear action, and a vertical crop built for a short ad.
Why travel day product effects work
Travel already implies movement, anticipation, and a small problem to solve. That gives an accessory a job. A bottle becomes the thing that survives a long layover. A skincare stick becomes the carry-on essential. A power bank becomes the last-minute save before boarding. Those tiny stories make a creator-style ad feel less staged than a product floating on a plain background.
Keep the product readable first. Use a clean silhouette, a label facing camera, and one color that separates it from the suitcase or seat. Adobe’s photoshoot planning guide makes the same practical point: location and props should support the idea rather than compete with it. For generated scenes, describe the product, setting, light, framing, and texture instead of relying on broad words such as “travel aesthetic.”
Travel day product effects: suitcase color contrast
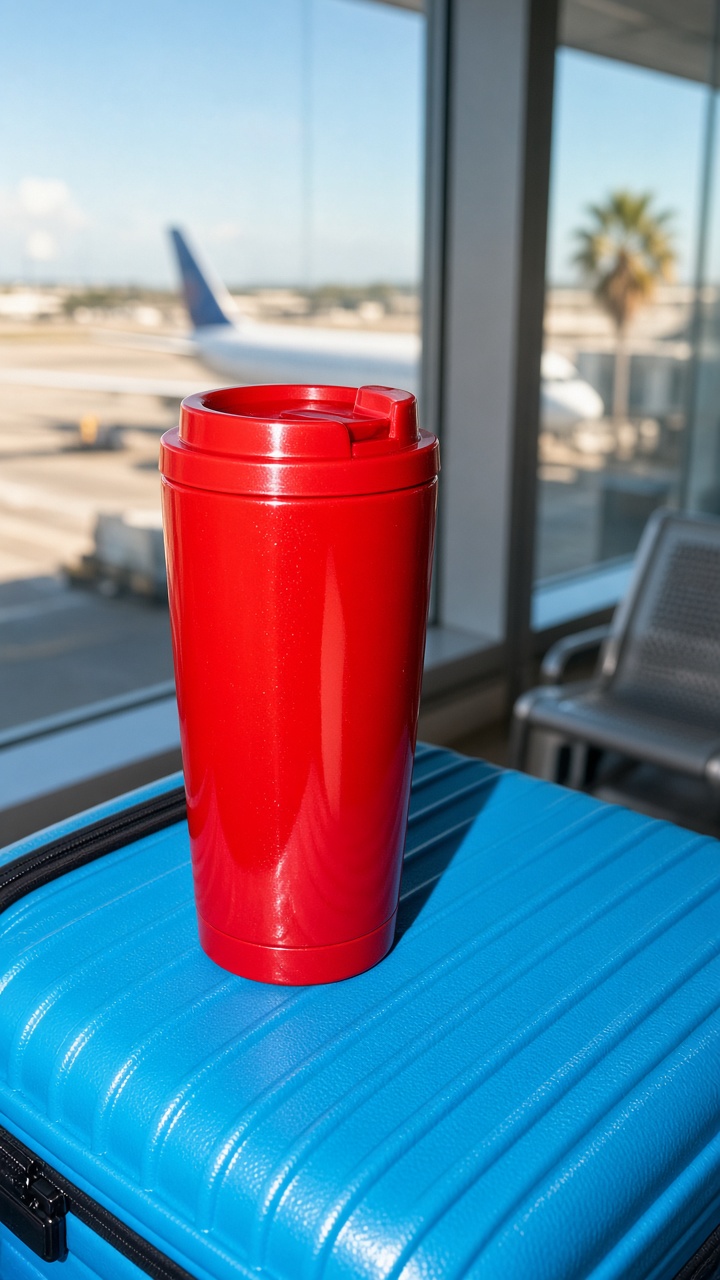
1. Make the case the backdrop
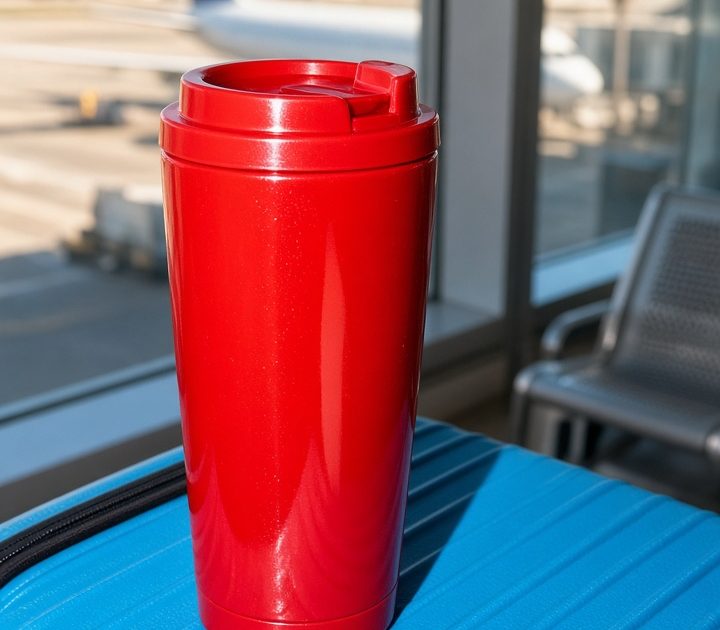
Put the product on a hard-shell suitcase, then treat the case like a bold color field. Pick two colors with enough separation to read on a phone. A red bottle on cobalt luggage works. So does a cream skincare tube on forest green. Avoid a busy suitcase print because it breaks up the label.
How to make it: Start with a straight-on close crop. Leave the handle, zipper, or luggage tag near an edge so the travel cue is obvious but secondary. Animate a two-second push-in, then add a small hand entering frame to pick up the item. End on the label for half a second. That last still gives editors a clean place for price text or a discount code.
Example prompt: “Vertical creator product ad, matte coral insulated bottle standing on a cobalt hard-shell suitcase, airport terminal floor softly blurred, direct flash, crisp label, close-up framing, candid travel day mood.” Keep the exact color names in the prompt. If the product has a logo or small type, use the original packshot as the reference image and ask for the scene around it.
Best use: This look works for drinkware, supplements, beauty minis, and travel organizers. It is also an easy first frame for a three-clip Reel: suitcase close-up, product pickup, then a destination shot.
Airport window light with a candid flash
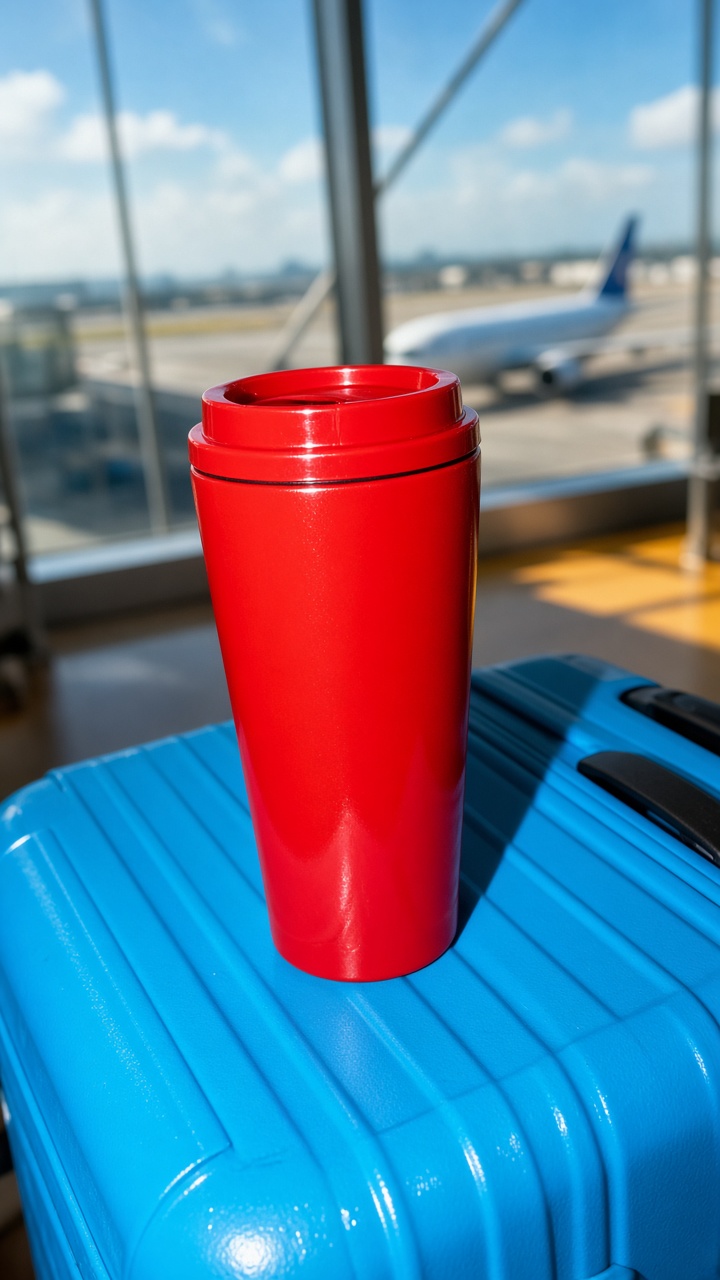
2. Shoot toward the gate, not the whole terminal
Window light gives the product shape, while a light direct flash keeps it from disappearing against a bright runway. Place the item on an armrest, café table, or open carry-on. Let the planes and gates fall out of focus. The viewer only needs enough background detail to recognize the setting.
How to make it: Frame vertically with the product in the lower middle third. Angle it slightly toward the window so the edge catches light. Keep the background one or two stops brighter than the product, then lift the product with a quick flash or a bright key light. In video, use a slow camera push and a rack focus from the departure board to the item.
Example prompt: “9:16 product video still, premium lip balm upright on an airport lounge table beside a boarding pass, morning window light, subtle direct flash, shallow depth of field, runway bokeh, natural creator ad.” Add the airport code only as a blurred detail. Clean, invented signage is safer than trying to reproduce a real departure screen.
Best use: Use this for makeup, headphones, fragrance, and small tech. It suits a calm voiceover about packing light or a text hook such as “The one thing that stays in the personal item.”
Security tray reveal
3. Turn the tray into a before-and-after beat
The security-tray setup creates a neat transition without needing a real airport shoot. Start with the product surrounded by ordinary carry-on items: passport cover, sunglasses, charging cable, and folded sweater. On the beat, clear the clutter or let the tray slide out of frame. The product remains in the same position, now on a clean surface with stronger light.
How to make it: Keep every prop low and flat so it does not block the product. Use a gray or charcoal tray for bright packaging and a pale tray for darker products. Film the messy first frame and clean second frame from a locked camera position. Cut on the motion of a hand, tray, or zip. If generating the visual, ask for a top-down angle and leave negative space near the product for a caption.
Example prompt: “Top-down vertical product scene, silver power bank centered in a charcoal airport security tray with passport cover, sunglasses, charging cable and folded white shirt, neat flat lay, direct flash, high contrast, room for headline text.”
Best use: This is a smart format for chargers, toiletry bags, travel adapters, and compact grooming tools. It also gives paid social teams a clear problem-solution sequence in under five seconds.
Boarding gate handoff
4. Use one hand and one point of view
For a more personal version of travel day product effects, shoot from the holder’s point of view. A hand holds the product in front of a gate chair, suitcase handle, or corridor. The scene feels like a quick creator update rather than a formal ad. The trick is restraint: one hand, one product, and one background shape.
How to make it: Keep fingers clear of the label. Match the manicure and sleeve color to the product palette, but do not use both as loud competing colors. Add a slight walking sway or a gentle hand turn. If the product is reflective, rotate it until the brightest window reflection sits on an edge instead of across the branding.
Example prompt: “Handheld vertical creator ad, hand holding wireless earbuds case beside a rolling suitcase at an airport boarding gate, soft afternoon window light, subtle motion blur in background, sharp product, relaxed premium travel mood.” For a consistent campaign, reuse the same sleeve color, luggage color, and time of day across every shot.
Best use: This format fits accessories, snacks, headphones, and wellness products. It can open a UGC-style ad, support a creator testimonial, or become a simple story frame with a tap-to-shop sticker.
Production checklist before posting
- Use a 9:16 crop and leave clear space at the top or bottom for platform text.
- Make the product larger than any prop. If the label is unreadable, the scene is not ready.
- Choose one travel signal per frame: suitcase, boarding pass, window, tray, or gate seating.
- Cut movement on a beat. A pickup, tray slide, or small camera push gives the edit a reason to change.
- Export one clean version and one version with a short hook. More product-video ideas are on the VideoMagic blog.
The strongest travel day product effects feel specific without becoming complicated. Start with the product story, then let the luggage, light, and motion do the supporting work.
Make this for your own products in VideoMagic
Turn a plain product photo into scroll-stopping video – free to start.